
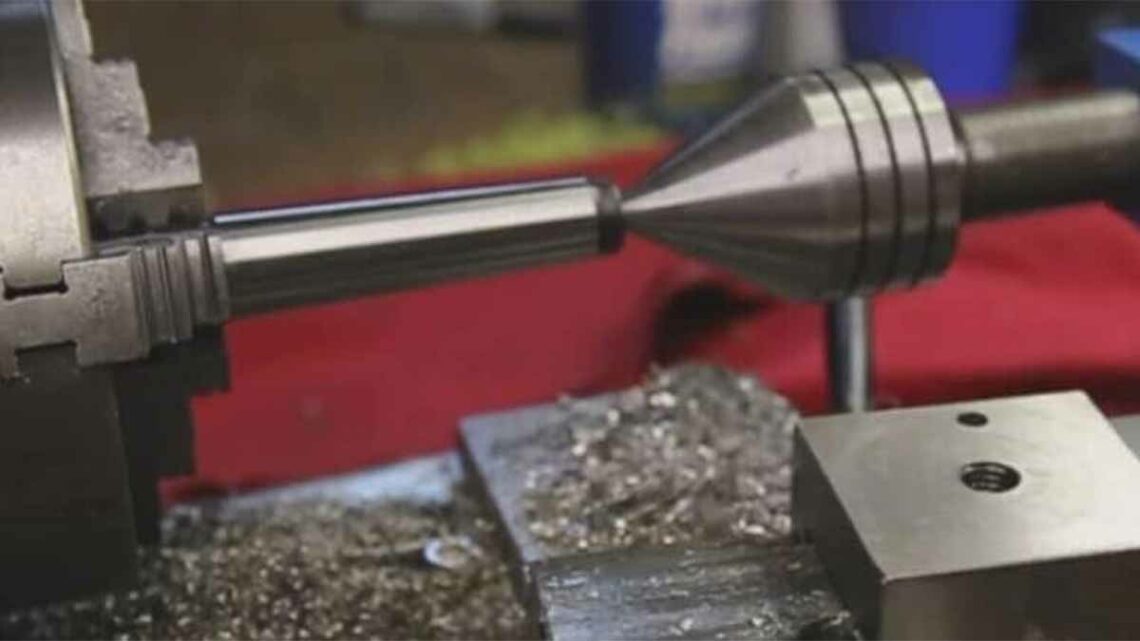
The width of an object is considered to be tapered as it varies evenly from one end to another. Taper turning is a mechanical procedure that involves gradually reducing the circumference of a cylindrical workpiece from one component to another. Let’s find out how to cut a taper on a lathe.
Internally or externally tapers are both possible. A machine has an exterior taper if it is tapered on the exterior, and an inner lathe taper if it is tapered inside of it. Turning tapers on a lathe may be done in three ways according to our how to cut a taper on a lathe guide.
The user will need to utilize the composite rest, offset the tailstock, then use the taper extension, based on the extent, duration, and position of the taper (internally and externally) as well as the number of parts to be finished.
The cutting edge of the cutting tool should be perfectly aligned with the direction of the workpiece in any of these techniques, otherwise, the work would not be completely cylindrical and the degree of taper will change for each stroke.
How to cut a taper on a Lathe
A lathe is a multipurpose machine that can be used for grinding, milling, chopping, turning, and changing.
You can effectively execute the above processes with the help of certain processes. Turning is the easiest of all these procedures. Even with a midi lathe, things will be the same. However, if you are looking for some best midi lathe, then you can check out our article.
Workers use so to keep the cylindrical bar’s diameter as small as possible. If a particular taper on the workpiece is needed, staff perform a taper turning process.
So how are we going to do it? Continue reading to learn more about taper turning techniques.
Numerous Techniques of Taper Turning
To use the techniques outlined below, you may tapper cut a lathe taper on a lathe. Now let us look at how these approaches perform and why you can use them.
1.Process by Using a Form Tool
This is a safe way to build a quick taper. The type has been landing and is being utilized in accordance with the requirements.
Both for the feed and cutting lathe axes are similar. The lathe taper attitude is maintained by the shape of the cutting instrument. You may use both crossover and quantitative feeds at the same time.
Furthermore, the taper duration should be greater than the cutting tool’s sheet thickness in such metal lathe like jet 1440.
The method generates a lot of noise. Since the entire cutting edge destroys the metal, this occurs.
As a result, even if the job of taper turning on the lathe is completed slowly, it necessitates a lot of force for turning a taper on a lathe. The amount of vibration is determined by the tool’s scale.
Advantages.
The most straightforward form.
Very accurate.
Negative aspects
Generates a lot of waves
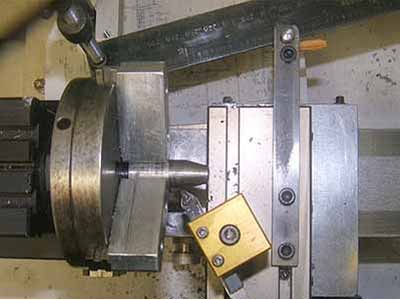
2.Method of Changing the Tailstock
The whole approach of “cutting a taper on a lathe” is used where there is no taper connection usable. The device bed axis is positioned at an angle where the work axis spins in this form of how to cut a taper on a lathe-like Powermatic lathe 422b.
The instrument runs in a straight line perpendicular to the machine bed for metal lathe taper attachment. The tailstock’s base worth is measured in mm or inches rather than degrees.
The analysis can be performed among cores since it is more at an angle. When the machining taper turning process is completed, the tailstock must be put back with extreme caution.
What is the procedure for establishing a parallel position? The measures are as follows:
Shift the tool’s nose to the left edge of the taper to grasp a sheet of paper inside the taper surface and instrument.
Monitor the recording on the semantic image segmentation dial. Remove the gadget.
To grasp the page, transfer the instrument to the top side of the taper.
Read the information; if it matches, the setup is fine with using a taper attachment on the lathe.
Here are some of the phases of this setup:
• Dissociate the tailstock’s grip moderately.
• Continue turning the screws till you have the necessary package.
• Arrange the tool in a simultaneous turning configuration.
• A raw cut is a good place to start.
• When you get the perfect taper, polish the scale.
Advantages.
• Lengthier jobs may be tapered using the automated feed, resulting in an improved substrate.
• The outer taper threads may be removed.
Negative aspects
• It’s impossible to remove the sheer taper.
• There is no way to erase the inner taper.
3.Method of Compound Slides
The complex slide procedure was developed for producing a quick and steep cutting of a taper on a lathe. In this process, the workpiece is clamped in the chuck, just as in every other lathe procedure.
The role revolves around the axis of the lathe. The compound rest should be swiveled to the appropriate angle until gripping.
Since it is balanced on top of the cross slide, the complex slide has the versatility to spin in all ways on its core pins.
Taper turning may be done around the outside of the workpiece or inside the bore taper turning on lathe-like Grizzly g0462.
There are two fundamental rules that govern the lathe compound slip. Most of them is that the cutting tool moves just as you like it to. Since loosening the nuts allows you to change the angle to your liking.
Another is that the work axis spins in the same direction as the lathe bed’s direction.
That cutting method is set using the tool article. You can send feed all along the intended direction and inclination by spinning the screw.
You have the appropriate tapper as the tool slides along the direction of the complex drop.
Advantages.
• You have the option of getting a higher, steeper, and shorter taper.
Negative aspects.
• Fining and commodity quality are also bad.
• Just a small taper may be trimmed.
If you’re using the compound slide form, here are a couple of pointers:
• Overhanging the instrument is dangerous.
• When placing the tool height point in the middle, be cautious.
• Make use of lubricant fluid.
4.Connection Process for Taper Turning
Where job mini-lathe taper attachment is a little unique. This installation requires the use of the bottom bracket or tray.
The workpiece is secured to the lathe bed’s back end. A leading bar is utilized to achieve the optimal turning angle.
This bar has the potential to swing, allowing for greater angle versatility. When conducting the procedure, the guiding bar often serves as its base.
It shifts on the guide bar with the aid of a guide block.
That lead block binds the crossed slide’s back end and aids in movement. The binder screw must be extracted to mount the cross slip with this “how to cut a taper on a lathe” guide.
As a result, the cross slide is no longer attached to the slide pin. It has degree graduations, much as a compounded slope. You may do any scale of turned-in your service using this process on a lathe-like Bolton metal lathe.
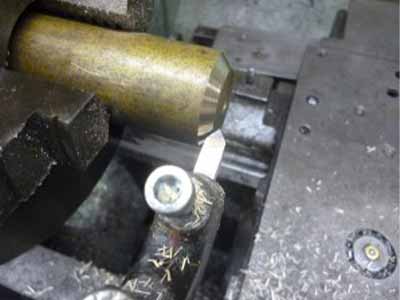
Use the leading edge of a tool
The angle of the machining taper is equal to the angle of the cutting tool’s edge in this process of mini lathe taper attachment. This is normally accomplished by grinding a piece of high-speed steel to the desired angle. Although if the tool’s edge is just a few millimeters long, several cuts along the same line can result in a long edge at an angle, i.e. a taper. It is essential to use a horizontal cutting edge. The angle of the taper has no restrictions.
This approach would operate regardless of how the workpiece is kept.
Chamfers are a form of chamfer
A chamfer is essentially a rather narrow taper. It’s often used on edges that would otherwise have been rough. Since the sharpness is gone, this has the effect of making handling the part feel more pleasant. It also has the benefit of reducing the likelihood of a ding on the edge. And if it is, it is of minor importance.
A 45° angle is commonly used with such a taper. It’s worthwhile to set up a tool specifically for this, as seen above. It creates a 45° chamfer that can be angled to the left or right.
A locking handle, for instance, would normally have chamfered edges on both sides. However, if you want to know about how to use metal lathe, then you can check this out.
In certain cases, a 60° angle is preferable for lathe taper turning attachment. Since these chamfers are normally very small, it is possible to use a single cutter/tool to cut both left and right chamfers at 45° and 60° angles.
Turning the top slide to make tapers
The upper slide is usually set up such that the cutter moves perpendicular to the lathe bed as it moves. Many of the top slides are designed to be rotating. When the instrument is twisted, the direction it takes when rotating the top slide is at an angle to the workpiece, and it cuts a taper.
This method can be used to cut every other taper angle. The duration of the top slide’s movement is the highest length of taper that can be used. It is, however, completely feasible to cut several tapers along the same thread.
If the direction of the taper isn’t important, the calibration on the top slide may be used to set it for turning a taper on a lathe.
Copying current tapers with the top slide.
1st method
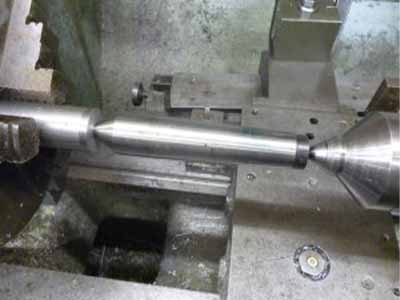
Frequently, the taper that has to be produced would fit into an established taper. A current taper may be used to set the angle of the top slide in this situation. Let’s pretend we have a middle with a Morse taper.
According to this “how to cut a taper on a lathe” guide, a side has a feminine middle, while the other has a male core. We will keep this by using a three-jaw chuck to hold a bit of a round rod. With a center drill kept in a drill chuck in the tailstock, we will drill a female center in it.
We will now keep the core between the feminine center at the headstock end and the center at the tailstock end.
Method 2: Creating a taper by turning the top slide.
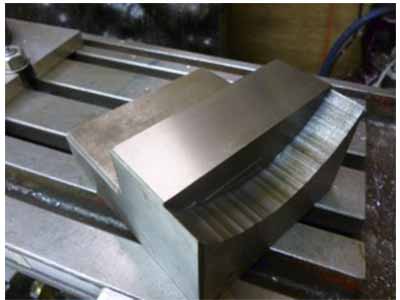
We may derive a second system using the aforementioned system. A surface layer pressing the side of the middle and a parallel flat surface touching the side of the top slide is also needed. However, the width of the taper and the side of the top slide are distinct. The trick is to use a device like the one seen in the illustration…
Figure machine for adjusting the top slide’s tilt.
The circular cutout is designed to match the top slide’s rim.
Method 3: Creating a taper by spinning the top slide
This approach makes use of a custom-made instrument. The cross slide is clamped with this instrument. It has a vertical section with a short shelf attached to it. The concept is that the foundation is installed with two bars on the underside.
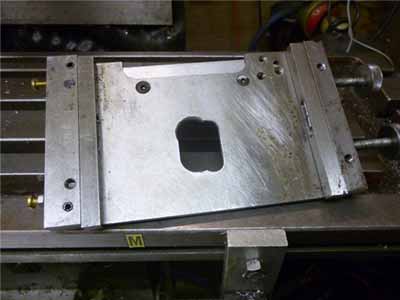
One is used such that the vertical portion of the cross slide is at a perfect angle to it. The tool is then tightly clamped to the cross slide with the other bar.
Alleviating the tailstock to make a taper – initial process
Keeping the tailstock in line with the headstock is among the most important orientations when establishing a lathe. Any offsets mean that rather than parts with two edges, curved parties will be produced.
Tapers can be created using this result. It has the advantages of requiring no special equipment and allowing for the production of very long tapers.
There are a lot of snags this time. Just the tiniest of angles can be created. On both sides, the workpiece must be held between the cores. Since these centers do not point at each other as they should, consistency is compromised. This would not rule out the possibility of a circular taper. The problem is that the workpiece’s taper is at an inclination to the cores of both the headstock and tailstock.
How to Use a Tapper Turning Device
This connection is similar to a direction type that is installed on the backside of the lathe and controls with the lathe’s axis, holding the lathe in the middle lane.
However, this aids in the freeing of the cross slide as well as leading it along the path of the taper to be removed.
A lead bar is fixed to the bracket that is connected to the lathe bed. Users can even swivel the guide to whatever angle they choose. A bolt secures the guide bar in position in this process.
The guide block is attached to the lathes cross slide with the aid of the lead and lock.
As a result, sliding along the guide bar is open. It also enables the cross to move about easily on its journey.
It must, though, be untethered from the saddle to travel freely. Simply release the cross-feed screw to disconnect the cross slide on the saddle’s linear feed.
It after every cut, you must adjust the tool’s cutting depth. We feed the tool a complete depth of cut using the revolving handle of the compounded slide, as we do for all other tools.
Place the complex slide in a typical setting, such as 90 degrees.
In addition, the direction of the guide bar would be parallel to that of the taper tool. Furthermore, the reference bar spindles on the taper angle and reads the scale symbol.
Taper Turning’s Benefits
• Establishing a connection is simple and convenient.
• The standard lathe setup is not hampered by this system.
• Finishing is preferable.
• The taper may be done both internally and externally.
• The connection may be used as taper-turning strings.
• Info on the flaws in taper turning.
Inadequate Taper: Having an inconsistent taper isn’t shocking if the tailstock, compound roll, or taper turning connection settings aren’t perfect. To stop this, make sure the settings are as precise as possible.
Inappropriate Taper Measurements: This may also be caused by incorrect settings.
Flawed Diameters: It’s not uncommon for one side’s size and angles of tapers to be correct, but the diameter of the other end isn’t. This flaw is caused by the taper’s duration being incorrect. This can be avoided by double-checking the taper duration.
Final Thoughts on how to cut a taper on a lathe
That’s all there is to know about a lathe machine’s taper cutter process. One crucial point to clarify is that taper cutting does not have to be done on a full-size lathe; it may also be done on a mini-size lathe.
Fingers crossed, this report has increased your taper turning experience. Feel free to leave a message if you’ve any problems or doubts.